
In the present digital era, if you are not a professional photographer, there are immense possibilities that you have heard about Photoshop application. Photoshop is a wonderful Adobe software that can help you edit photographs and make them look their best. To give the finest touch to the photographs, many different process in Photoshop helps us a lot. Teeth whitening is such a cool process that helps to give a more sophisticated touch to edited photographs. In the realm of photography, we can learn how to whiten teeth in Photoshop. So, let’s get a quick recap.
Table of Contents
How to Whiten Teeth in Photoshop- Check Out These Tips

Glowing teeth in your photos is all you want for yourself? But how to do that? Don’t worry; we will show how to whiten teeth in Photoshop with some cool steps.
1) Select a Photo and Open it
Adobe Photoshop is an excellent application with whose help you can learn to whiten your teeth. Select a photo and open it in the Adobe Photoshop application. For this, go to the file menu, go to open, choose the image you want to edit, and click on it to open. The image that you choose for teeth whitening must be of high quality.
2) Locate the Number of Subjects in the Photos
If you are picking a single photo or multiple photos for teeth whitening, you should check out the number of subjects in the photos. For example, if you have a single subject in a photo, you must perform the whitening process only once. As against it, if you have multiple subjects in the photos, you must perform the whitening process multiple times for the best results. You should perform the all steps separately on multiple photographs.
3) Go to the Lasso Tool
When you start the teeth whitening process, you must pick a lasso tool for the selection of photographs. To select the lasso tool, go to the left corner of the screen, and then select the toolbar panel, and then select the lasso tool. Now, draw a selection around each tooth around your mouse.
After selection, you can begin the process of teeth whitening process. If you make a selection with the mouse, the selection may not be appropriate.
If you have selected the teeth appropriately, you will see a dash line selection around the teeth. This indicates that you have made a successful selection. For selection purposes, you can also select a pen tool.
4) Create a Hue/Saturation Layer
The next step is adding an adjustment layer to the photoshop. This is an important step in how to whiten teeth in Photoshop. For adding this layer, go to the layer panel, and then click on the bottom right side of the window panel. Now, you will see a new fill or adjustment layer button, click on it. You have two options, select either hue or saturation layer or curves.
5) Adjust the layer Option to “Yellow.”
For tooth whitening, the next step is to adjust the layer option to “yellow.” To perform this step, go to “hue, saturation layer, and then click on the “properties panel. Now, you will see a drop-down menu, click on “master to bring a drop-down menu.” Go further, and select the option “Yellow” from the drop-down menu.
If now, you try to make any alterations to the adjustment layer, it will only affect the yellow part in the selection process. This is one of the most important steps that helps in learning “how to whiten teeth in Photoshop.”
4) Control the Yellow Saturation
Whenever you edit any image, you can brighten the yellow layer. As soon as you choose hue or saturation, a dialogue box will appear. You can now move the lightness slider towards the right. It will increase the brightness and whiten the teeth.
There is another option of selecting curves. Whenever you select the curves, a curve graph will appear. Create an S curve by clicking and dragging the curve upward slightly in the middle. This will increase the brightness of the selected area effectively whitening the teeth.
5) Judge your Results
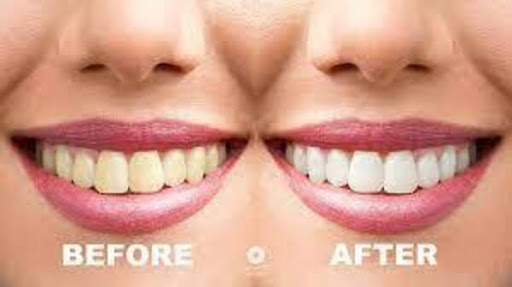
Now, as you have whitened your teeth, you must judge the results swiftly. For the judgment, you should compare the whitened teeth to those sets of teeth that have looked original. Go to the layer panel and then select on hue/ saturation adjustment layer’s visibility icon. Click on it once, it will temporarily hide the effects of the adjustment layer, and view the original image.
You will click on it again, and it will turn the adjustment layer back on and you will be able to view the whitened version. Once you complete these steps, you can easily compare the before, and after images. The left half of the teeth show how they looked originally, and the right half will show how the teeth looked after removing yellow from them.
6) Learn to Clean up the Selection area
When you make a selection with the lasso tool, there are some chances that you select some part inaccurately. Otherwise, we can say that some inaccuracies are left in the process. So, if it is so, you must learn to clean up the selection area.
Go to the brush tool in the tool panel. Now, to paint out those areas that should not be whitened, you must select foreground color as your paint color. Paint those areas to remove them from the selection. If you want to paint those areas that you have missed in your initial selection, select the background color white as your paint color. Follow the process and add them to the selection.
7) Whiten the teeth if you have additional subject
If you have more than one subject for teeth whitening, you should repeat the entire process one by one separately. It will help you to select the multiple subjects for whitening and whitening your teeth effectively.
Conclusion
We hope that now you have learned the process of how to whiten teeth in Photoshop. If you master the process of teeth whitening, you will find that your edited photographs look more natural and amazing. Try the process of teeth whitening to make your photographs much more natural and soothing.


